Salt, Time and Patience: The Home-Curing Mindset
Bite a raw olive off the tree and you will spit it out — it is almost violently bitter. Every olive you have ever eaten was cured to remove that. Doing it at home is deeply satisfying, but it asks for one thing above skill or kit: patience.
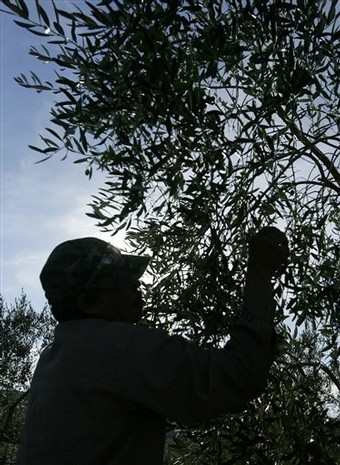
The whole craft of the olive is a patient argument with one molecule. Fresh fruit is loaded with a bitter compound called oleuropein, and curing is simply the slow business of leaching it out until the olive turns from inedible to delicious. Get the mindset right — restraint, a taste every week, trust in salt and the calendar — and the technical steps are almost easy. Rush it, and it shows in every bite.
Why raw olives are bitter
Oleuropein is concentrated in the flesh and makes a raw olive genuinely inedible; your mouth is not being fussy, it is being warned. Curing draws that compound out using water, salt, time, or a chemical shortcut. The point people miss is that there is no clever trick that skips the wait — the bitterness leaves at the pace the method allows, and no faster. Everything below is really the same idea dressed four different ways.
The four traditional routes
Each method trades speed against forgiveness. Water-curing soaks cracked olives and changes the water over weeks — slow, gentle, hard to ruin. Brine-curing ferments them in salt water, slower still, and rewards you with the deepest flavour. Dry-salt curing packs the fruit in salt to pull out moisture and bitterness together, giving the wrinkled black olive of the Mediterranean. Lye-curing is the fast, industrial route — it works in days but uses caustic soda and leaves no room for error. For a first home cure, ignore lye entirely.
| Method | Speed | Forgiveness | Result |
|---|---|---|---|
| Water-cure | Slow (weeks) | Very high | Mild, firm; changes water often |
| Brine-cure | Slower (weeks–months) | High | Deep, savoury, fermented |
| Dry-salt | Weeks | Medium | Wrinkled, intense, oil-slicked |
| Lye | Days | Low — caustic, unforgiving | Fast, uniform; skip at home |
The patience it demands
This is the part everyone underestimates. Depending on method and fruit, curing runs from a few weeks to many months, and the olives are simply not ready before then. You change the water; you wait. You taste; you wait more. The home curer’s real skill is not knife-work or brine chemistry — it is restraint: resisting the urge to call them done early. The reward is a jar of olives that are genuinely, completely yours, finished, of course, with a slick of good oil.
Tips for a first cure
- Start with a single small jar in year one, so a mistake costs you little and you learn the rhythm.
- Crack or slit each olive so the bitterness has a way out — whole, unbroken fruit cures far slower.
- Taste every week or two; that running taste-test is how you learn what ‘done’ feels like for your fruit.
- Keep every olive under the brine with a weight — anything exposed to air can mould.
- Once cured, store under fresh brine topped with a film of oil to seal out air. Patience first, oil last.
Home-curing olives: common questions
Why can’t you eat olives straight off the tree?
Raw olives are packed with oleuropein, a bitter compound that makes them essentially inedible. Curing leaches it out; there is no ripe stage at which a raw olive simply tastes good.
Which curing method should a beginner start with?
Water-curing or brine-curing. Both are slow but very forgiving. Avoid lye-curing first time — it is fast but uses caustic soda and punishes any mistake.
How long does home-curing take?
Anywhere from a few weeks to several months, depending on the method, the variety and the ripeness. Green olives take longer and stay firmer; riper black ones cure faster and softer.
How do I know when the olives are done?
Taste. When they are pleasantly bitter rather than mouth-puckering, they are ready. A running taste-test every week or two is the only reliable guide.
How do I store cured olives?
Repack them in fresh light brine, keep them fully submerged, and float a film of olive oil on top to seal out air. Store cool and dark.
Start with one jar your first year, so a mistake costs almost nothing and you learn the rhythm of the thing. Taste an olive every week or two as it cures — that running taste-test is how you learn what ‘done’ feels like for your fruit and your method, which no recipe can tell you. Once cured, store them under brine with a film of oil on top to seal out air. Patience first, oil last.
Based on traditional olive-curing methods, described generally; brine strengths and timings from home-pickling guidance. Follow safe food-handling guidance.